
I’m normally very bad at documenting. But since it’s still fresh, I will document my mixing and finalizing Reaper templates I used on my 2nd album, for me to keep track, and perhaps it could inspire others.
It’s not about “how to get a perfect mix”, there are hundreds of YT videos for that.
It’s just what I did, and why. Warning: it’s nerdy by nature…but not a TED talk though.
Full size pictures if you click on thumbnail.
Note: I did not provide links to plugins I use, on purpose. It’s really a matter of personal taste, and probably standard DAW plugins would do the job as well.
Mixing template
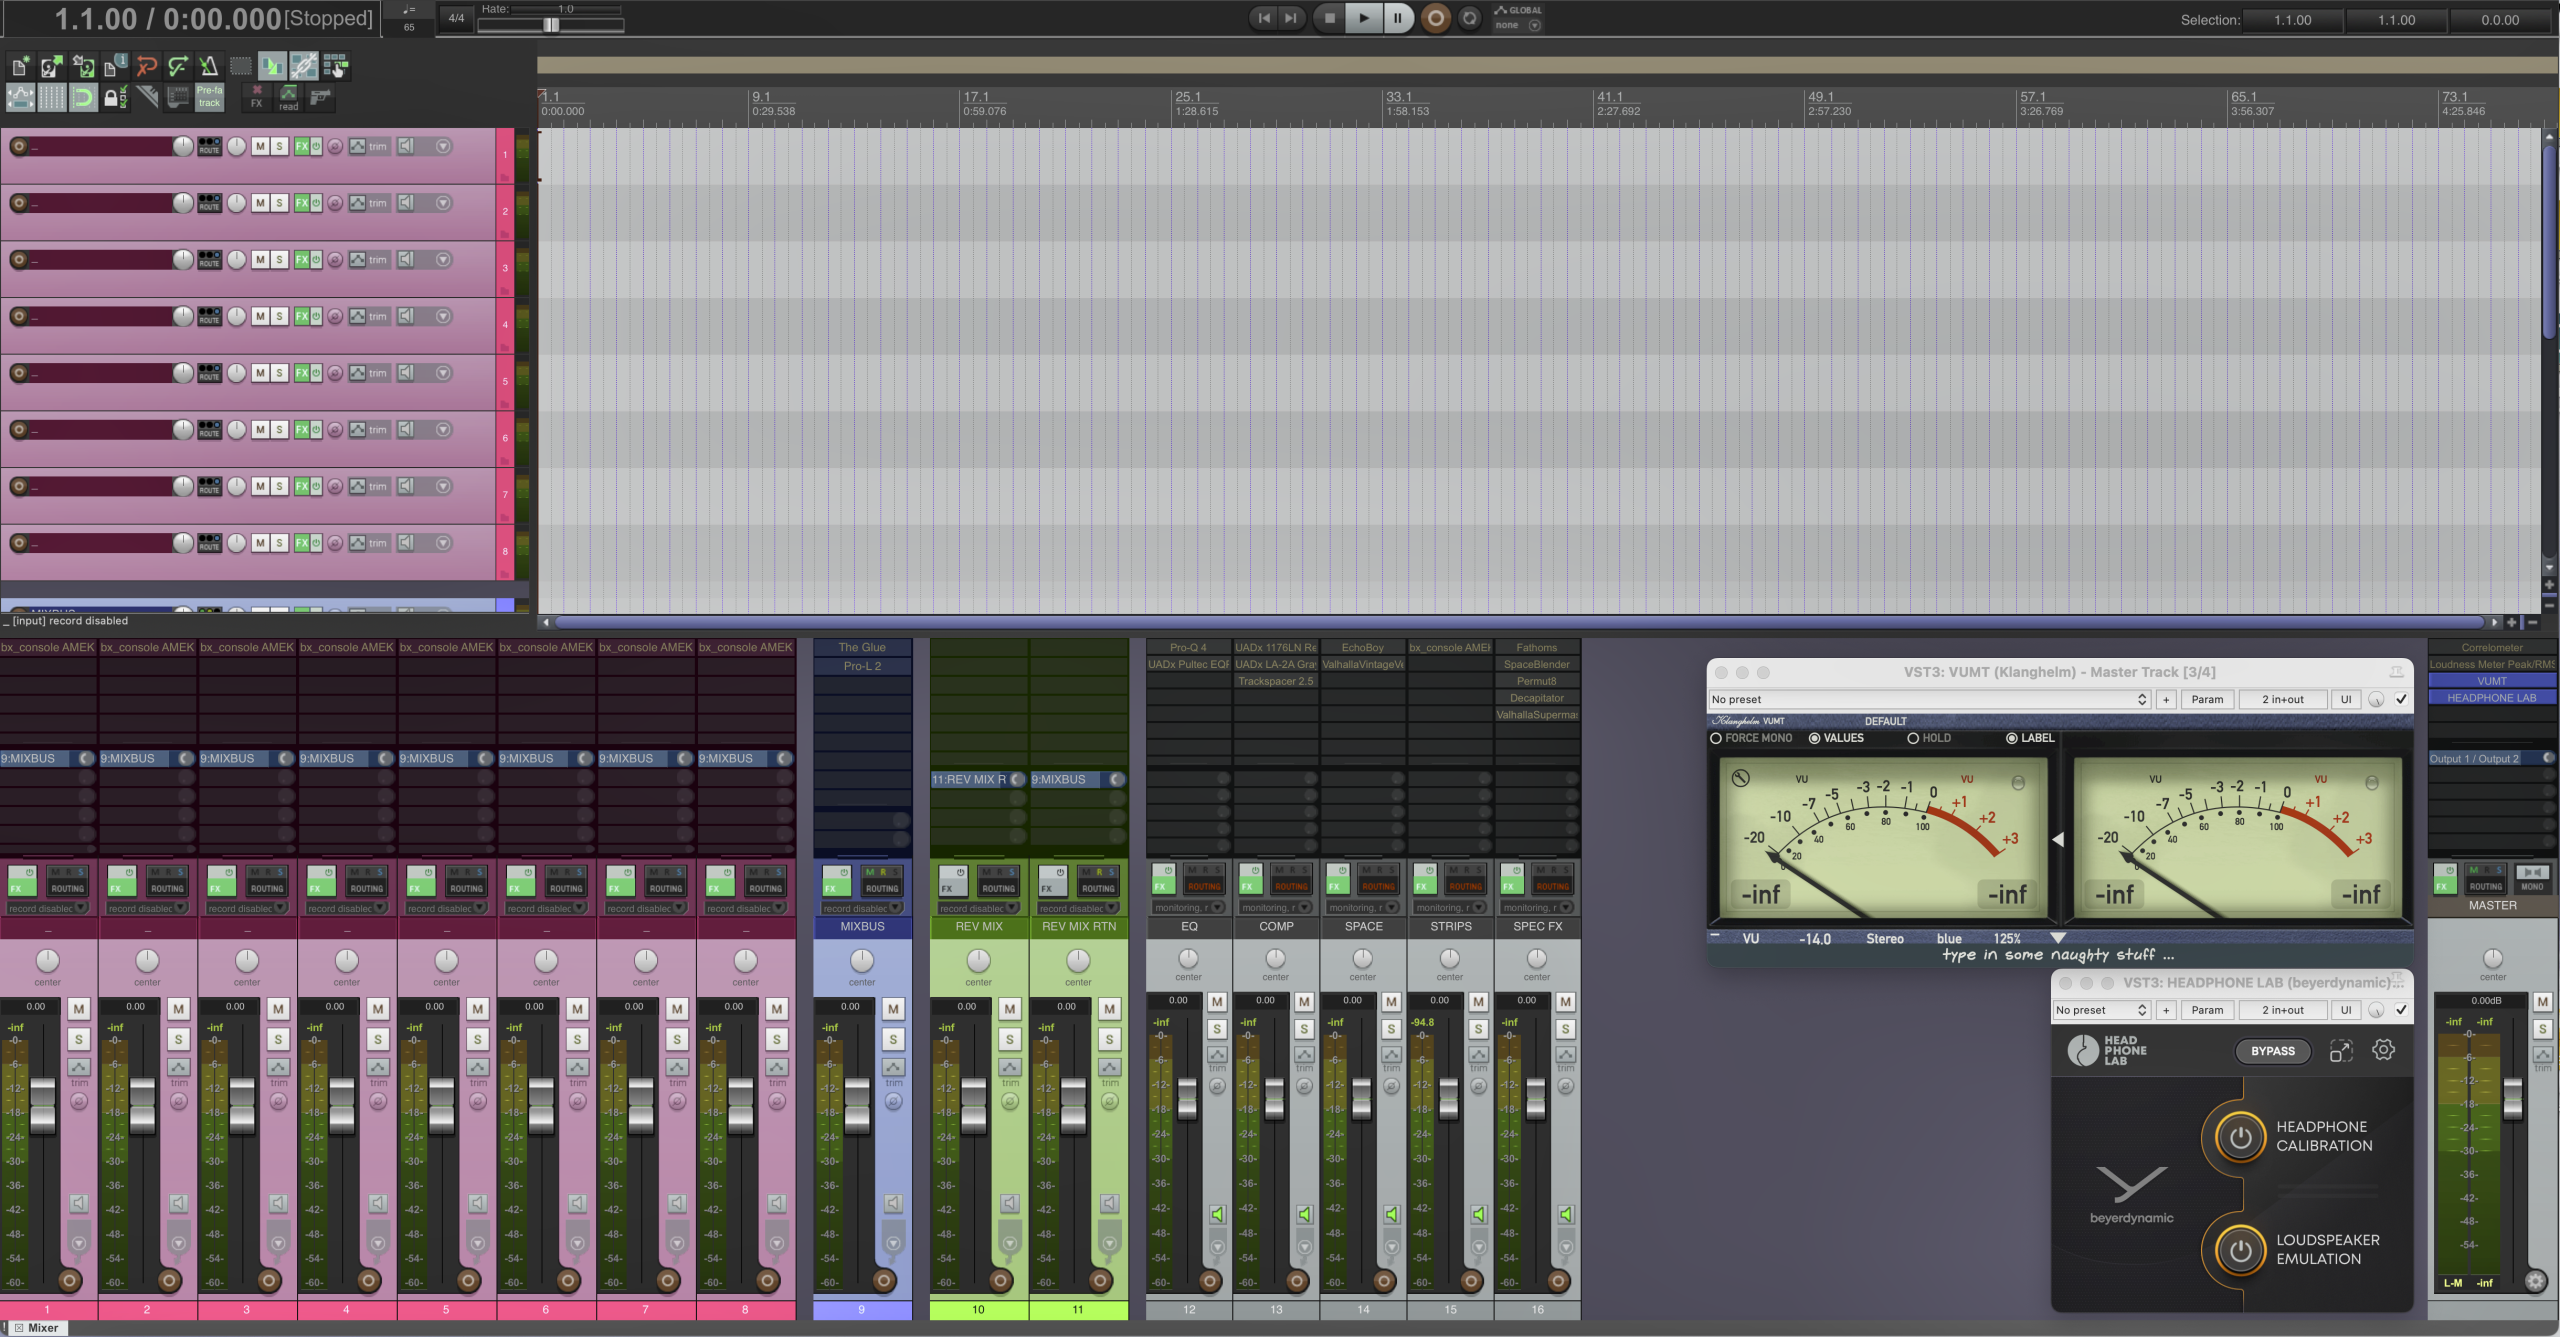
From left to right:
Pink tracks: Where I import recorded stems. All have a channel strip in insert (Brainworx AMEC 9099 console).
Since I use mainly analog emulation plugins, the first thing I do before inserting any plugin, is gain staging on input levels. I use good old VU-meters, set at -14dB = 0VU. The target is -5 VU for each track. The advantage of VU-meters over bar-meters is that you measure average level, and needle movement gives a good representation of dynamics.
It is sometime said that with modern DAWs, gain staging makes no sense, due to huge available headroom. I don’t agree for many reasons. Even totally digital plugins are not happy with input signal making them clip. They are designed for a sensible input level. Sound sources you’ll be mixing may be from different origins, and thus have different levels. If you don’t want to have your mixing faders all over the place, do gain staging…
All track are routed to Mixbus by default, and target with all tracks playing is -3 VU on Mixbus. Routing to effect busses are done afterwards.
Blue track: Mixbus, with by default one bus compressor (Cytomic The Glue) and one limiter (Fabfilter L2). Mixbus is routed to Master bus. Limiter is set at -4dB true peak.
Green tracks: Effect bus (add one per effect used). By default it is a general reverb bus. It’s send- return configuration, routed to Mixbus. Most of the time, I only use just one reverb for a mix. My preferred one is Valhalla VintageVerb.
When I use large ambiance reverb, in order to avoid that it soaks the entire mix, I insert a compressor on reverb return, sidechained to Mixbus – yes I do that. It is tricky to set, but very effective. You have to insert a very soft compressor for that. I use Wavefactory Trackspacer, which is designed for this purpose. It improves mix clarity a lot, but probably is only valid for ambient music.
Gray tracks: These are placeholder dummy tracks (no in, no out) which purpose is to have all plugins I use without scrolling plugin list. There are 13 plugins. I do everything with them and never add others. I chose them for their versatility and ease of use. This is a self-imposed limitation to avoid guessing what to use to address issues or make things sound like I want. And with some practice, it makes life much more easy.
EQ: Only 2, to replace or complete channel strips ones.
Fabfilter Pro Q4, for surgical frequency adjustment.
UAD Pultec EQP-1A, dead easy to use with 2 big knobs, widely used, good for global tone setting, on busses for example.
Compressors: Only 2, to replace or complete channel strips ones, and one for subtle sidechain.
UAD 1176LN, ultra quick attack, good on percussive sounds, or piano. Dead easy to set, only 2 knobs, in/out.
UAD LA-2A Gray edition, slow attack, good on anything. Only 2 knobs, in/out.
Hardware versions of those two are probably in every recording studio.
Space FX: Only 2. Soundtoy Echoboy, which has a huge collection of hardware emulations. Valhalla VintageVerb, with nice presets to start with. My favorite reverb.
Channel strip: Brainworx AMEC 9099 console. Easy to use like a SSL, but a little deeper sounding. Channel strips are magic. Insert one on a track, default setting without moving any knob, and it’s already sounding like thru analog gear.
Special FX: Only those I use all the time.
Puremagnetik Fathoms.
Soundtoys SpaceBlender: granular FX.
Sonic Charge Permut8: Crazy effect, difficult to describe.
Decapitator: The standard saturation plugin, when you need nice extra overtones.
Valhalla Supermassive: A classic for ambient music.
Master bus: I never add active plugins on it.
On this one I’ve got the most useful plugin I ever had, which is free btw. For the sake of domestic peace, I mix with headphones and finalize with monitors. I use a Beyer DT 770 PRO. Beyer has released a plugin for their headphones (Headphone Lab), which emulates listening with monitors. It basically reduce stereo to a 60° angle, like triangular monitor configuration. I used it for all the album, and I must say that while not being 100% accurate, it is absolutely useful to avoid bad surprises when switching to monitors. With headphones, your left ear does not hear what right one does. Listening is cool, sound seems to be all around you head, but it fools you for mixing for speakers.
Finalizing template
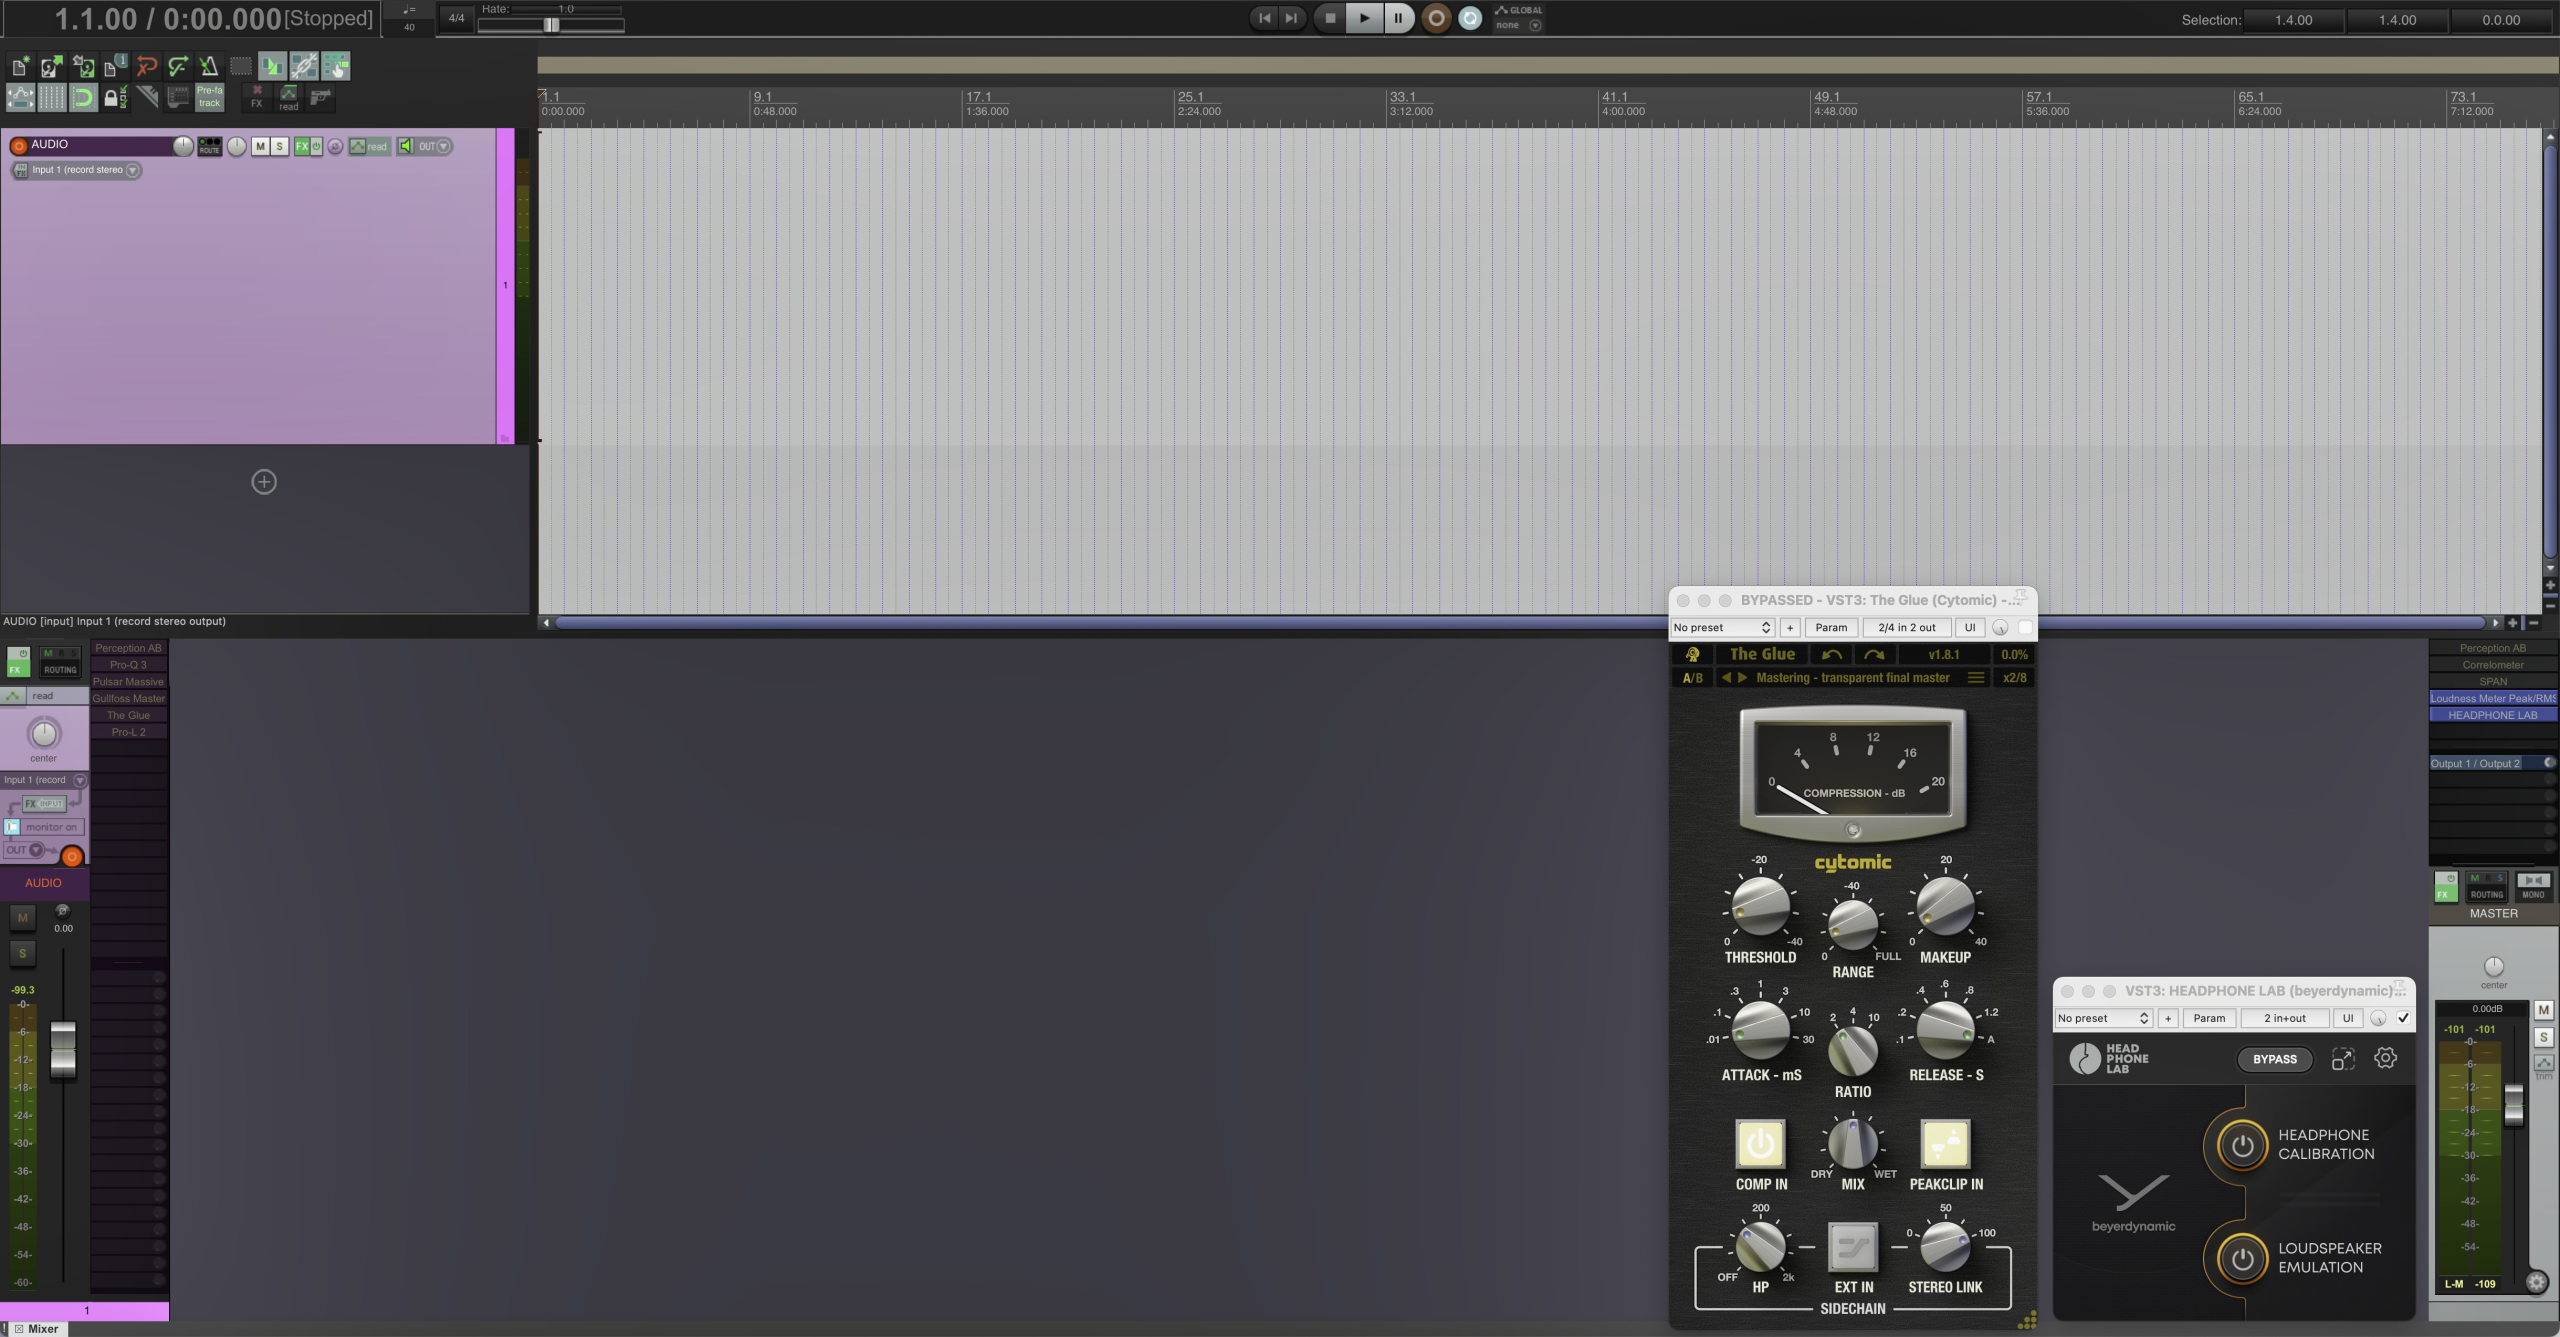
I won’t name this step Mastering with respect to my actual skills, but Finalizing. It is about processing final stereo mix for digital release on Bandcamp. I adopt the same philosophy as for mixing: few number of plugins that I know well for all the tracks.
In insert on stereo track:
Fabfiiter Pro-Q3 for surgical filtering, if need be.
Pulsar Massive passive EQ, which emulates famous Manley hardware unit. I use it in Mid/Side configuration for subtle adjustments.
Gullfoss Master EQ, for global equalization.
Cytomic The Glue compressor.
Fabfilter Pro-L2 limiter, set at -2dB true peaks.
I also use Perception AB dual plugins, which allow pre/post FX comparison with just one click, and most of all, listening pre and post at constant volume. This avoids to be fooled by louder = better trap.


